
Updated: November 29, 2023
Many ZebraHost customers use Microsoft Remote Desktop Protocol (RDP) to connect directly to their Windows server’s desktop interface. However, keeping an active and open RDP connection can pose significant security risks for businesses. Unauthorized users can cause damage through RDP, and it can consume a lot of server resources. Microsoft also charges extra for simultaneous, active connections.
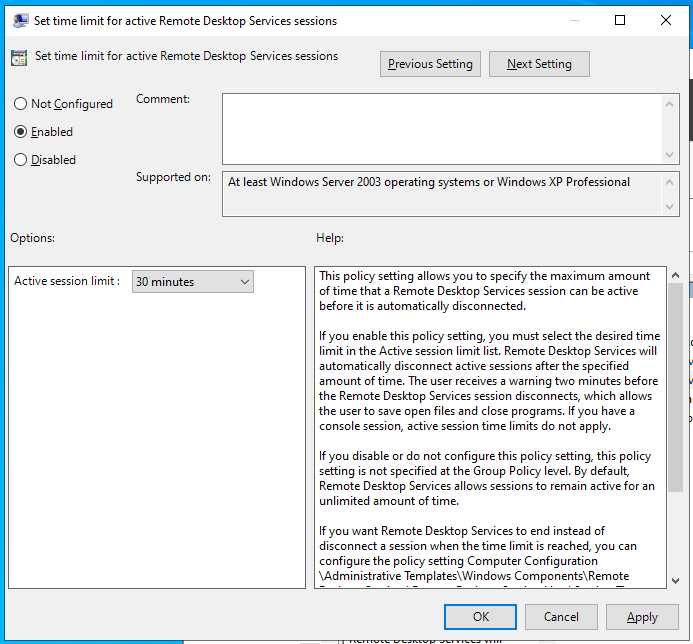
So here’s a helpful tip: You can set a time limit for an active RDP session. This means you can configure RDP sessions to automatically expire in 15-minute intervals, ensuring users don’t exceed their allotted session time. Here’s how to do it:
RDP Session Time Limit Setup
For the Windows server that you want to set an RDP connection time limit on, follow these steps:
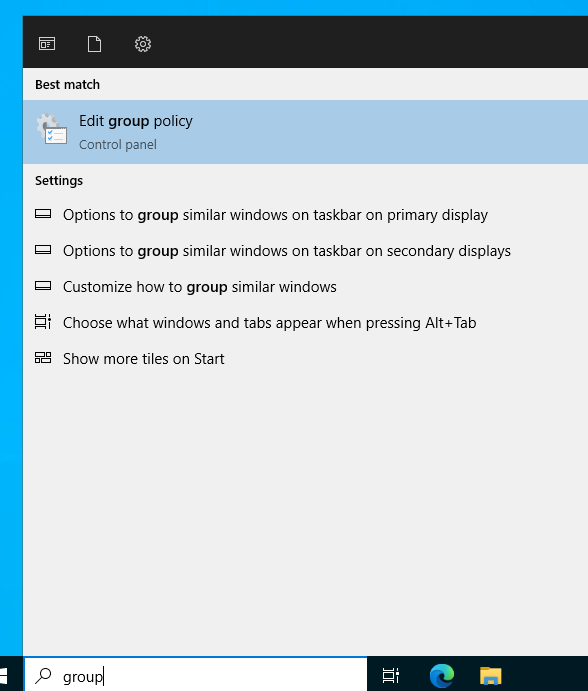
- Open Group Policy Management: Press “Windows + R,” type “gpedit.msc,” and hit Enter. This opens the Group Policy Management Console.
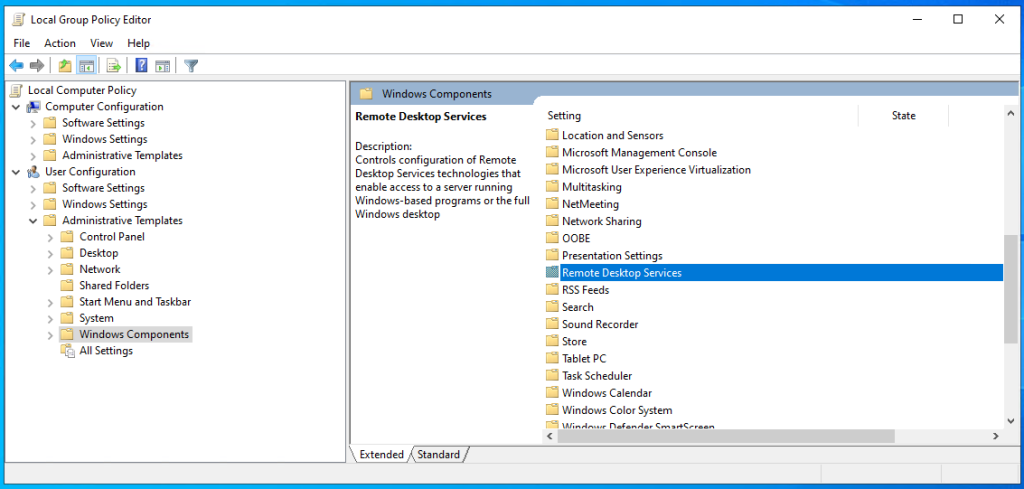
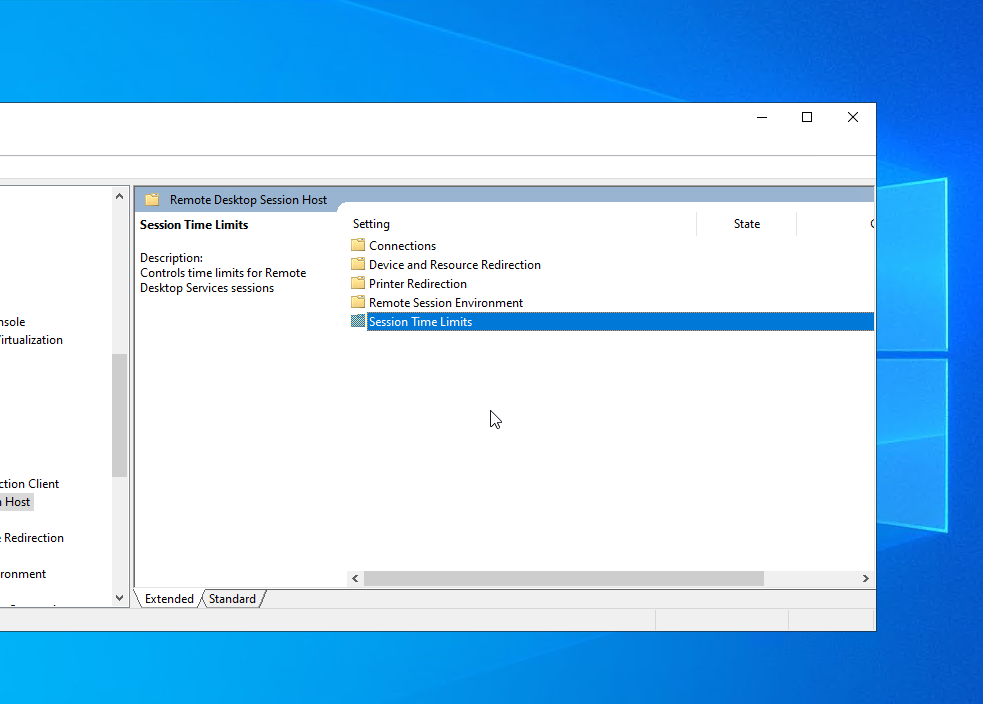
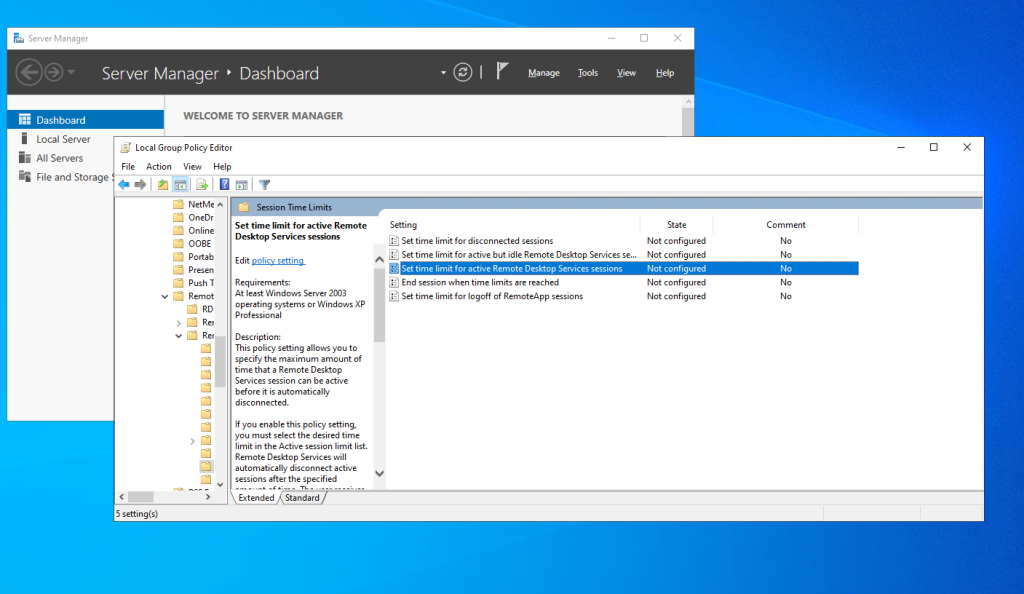
2. Edit GPO Settings: Navigate to “User Configuration” > “Administrative Templates” > “Windows Components” > “Remote Desktop Services” > “Remote Desktop Session Host” > “Session Time Limits.” Here, you can configure time limits that apply to all machines in your domain.
Conclusion:
That’s it! Now, when users connect to that specific server they will be restricted to whatever time limit you set. If they want to stay connected, they will be required to open a new session.
We highly recommend setting a time limit session for anyone outside your organization such as a consultant, support engineer etc. This will make sure they do not drain resources and can be locked out by changing credentials should they no longer require access to the machine.
If you do not feel comfortable setting your own RDP time limit, connect with the ZebraHost support team so we can assist.